herbarium how-to
I frequently receive inquiries about my herbarium process, and as a result I started sharing herbarium tips on Instagram under the hashtag #herbariumhowto. Here, I expand on those tips and keep them catalogued for easy reference. Thank you again for all your comments, questions, and feedback on this topic!
step 1: collecting - where to collect
When looking for specimens to add to your herbarium, the best places to look are along edges- here is where you will find the most diversity. Look along pathways, and field and woodland borders. Fence lines and railways also have a great variety, as the plants here are protected from the frequent trimming other areas are subjected to. Never collect from private property, and use caution along roadways! Also be aware of restrictions- never collect from nature preserves and be knowledgeable of species that are protected in your area- these are better inventoried digitally, as it is often both illegal and detrimental to natural populations to collect physical samples of these plants.
Look along edges to find the greatest species diversity.
Collect a sample of all parts of the plant to aid in identification. Often, a single bloom and leaf from each plant is sufficient, leaving the remainder of the plant alive and intact.
step 1: collecting - what to collect
Plants are easiest to identify when flowering and press best when they have fresh blooms. Keep an eye out for plants that are close to blooming, and collect a sample as soon as the flowers open! Always collect healthy, pest-free, and dry specimens- all these things will ensure a better quality press. Be sure to collect all parts of the plant that can help in identification, including flowers, seed pods, and basal leaves if they differ from those on the stem. Note unique characteristics, such as smell, texture, height, and general growing conditions, all of which will aid in identification but are not necessarily noticeable in a dried specimen. Be sure to keep record of the date each specimen was collected! This is also a potential tool for identification, and I have found it to be an interesting bonus, to track how bloom times differ from year to year for each species.
step 2: preparation - protecting the specimens
After collecting, protect the specimens from damage during transport. Place them in sealable plastic bags within a sturdy leather satchel to help retain moisture and to protect them from both heat and breakage. For best results, press the plants immediately after returning from collecting. Recover slightly wilted plants by placing the stems in water for a short time prior to pressing, making sure to dry them again thoroughly before adding them to the press. If pressing must be delayed, some sturdier plants can tolerate being stored in the refrigerator in their plastic bags for up to a day’s time.
Protect plants from heat and damage during transport.
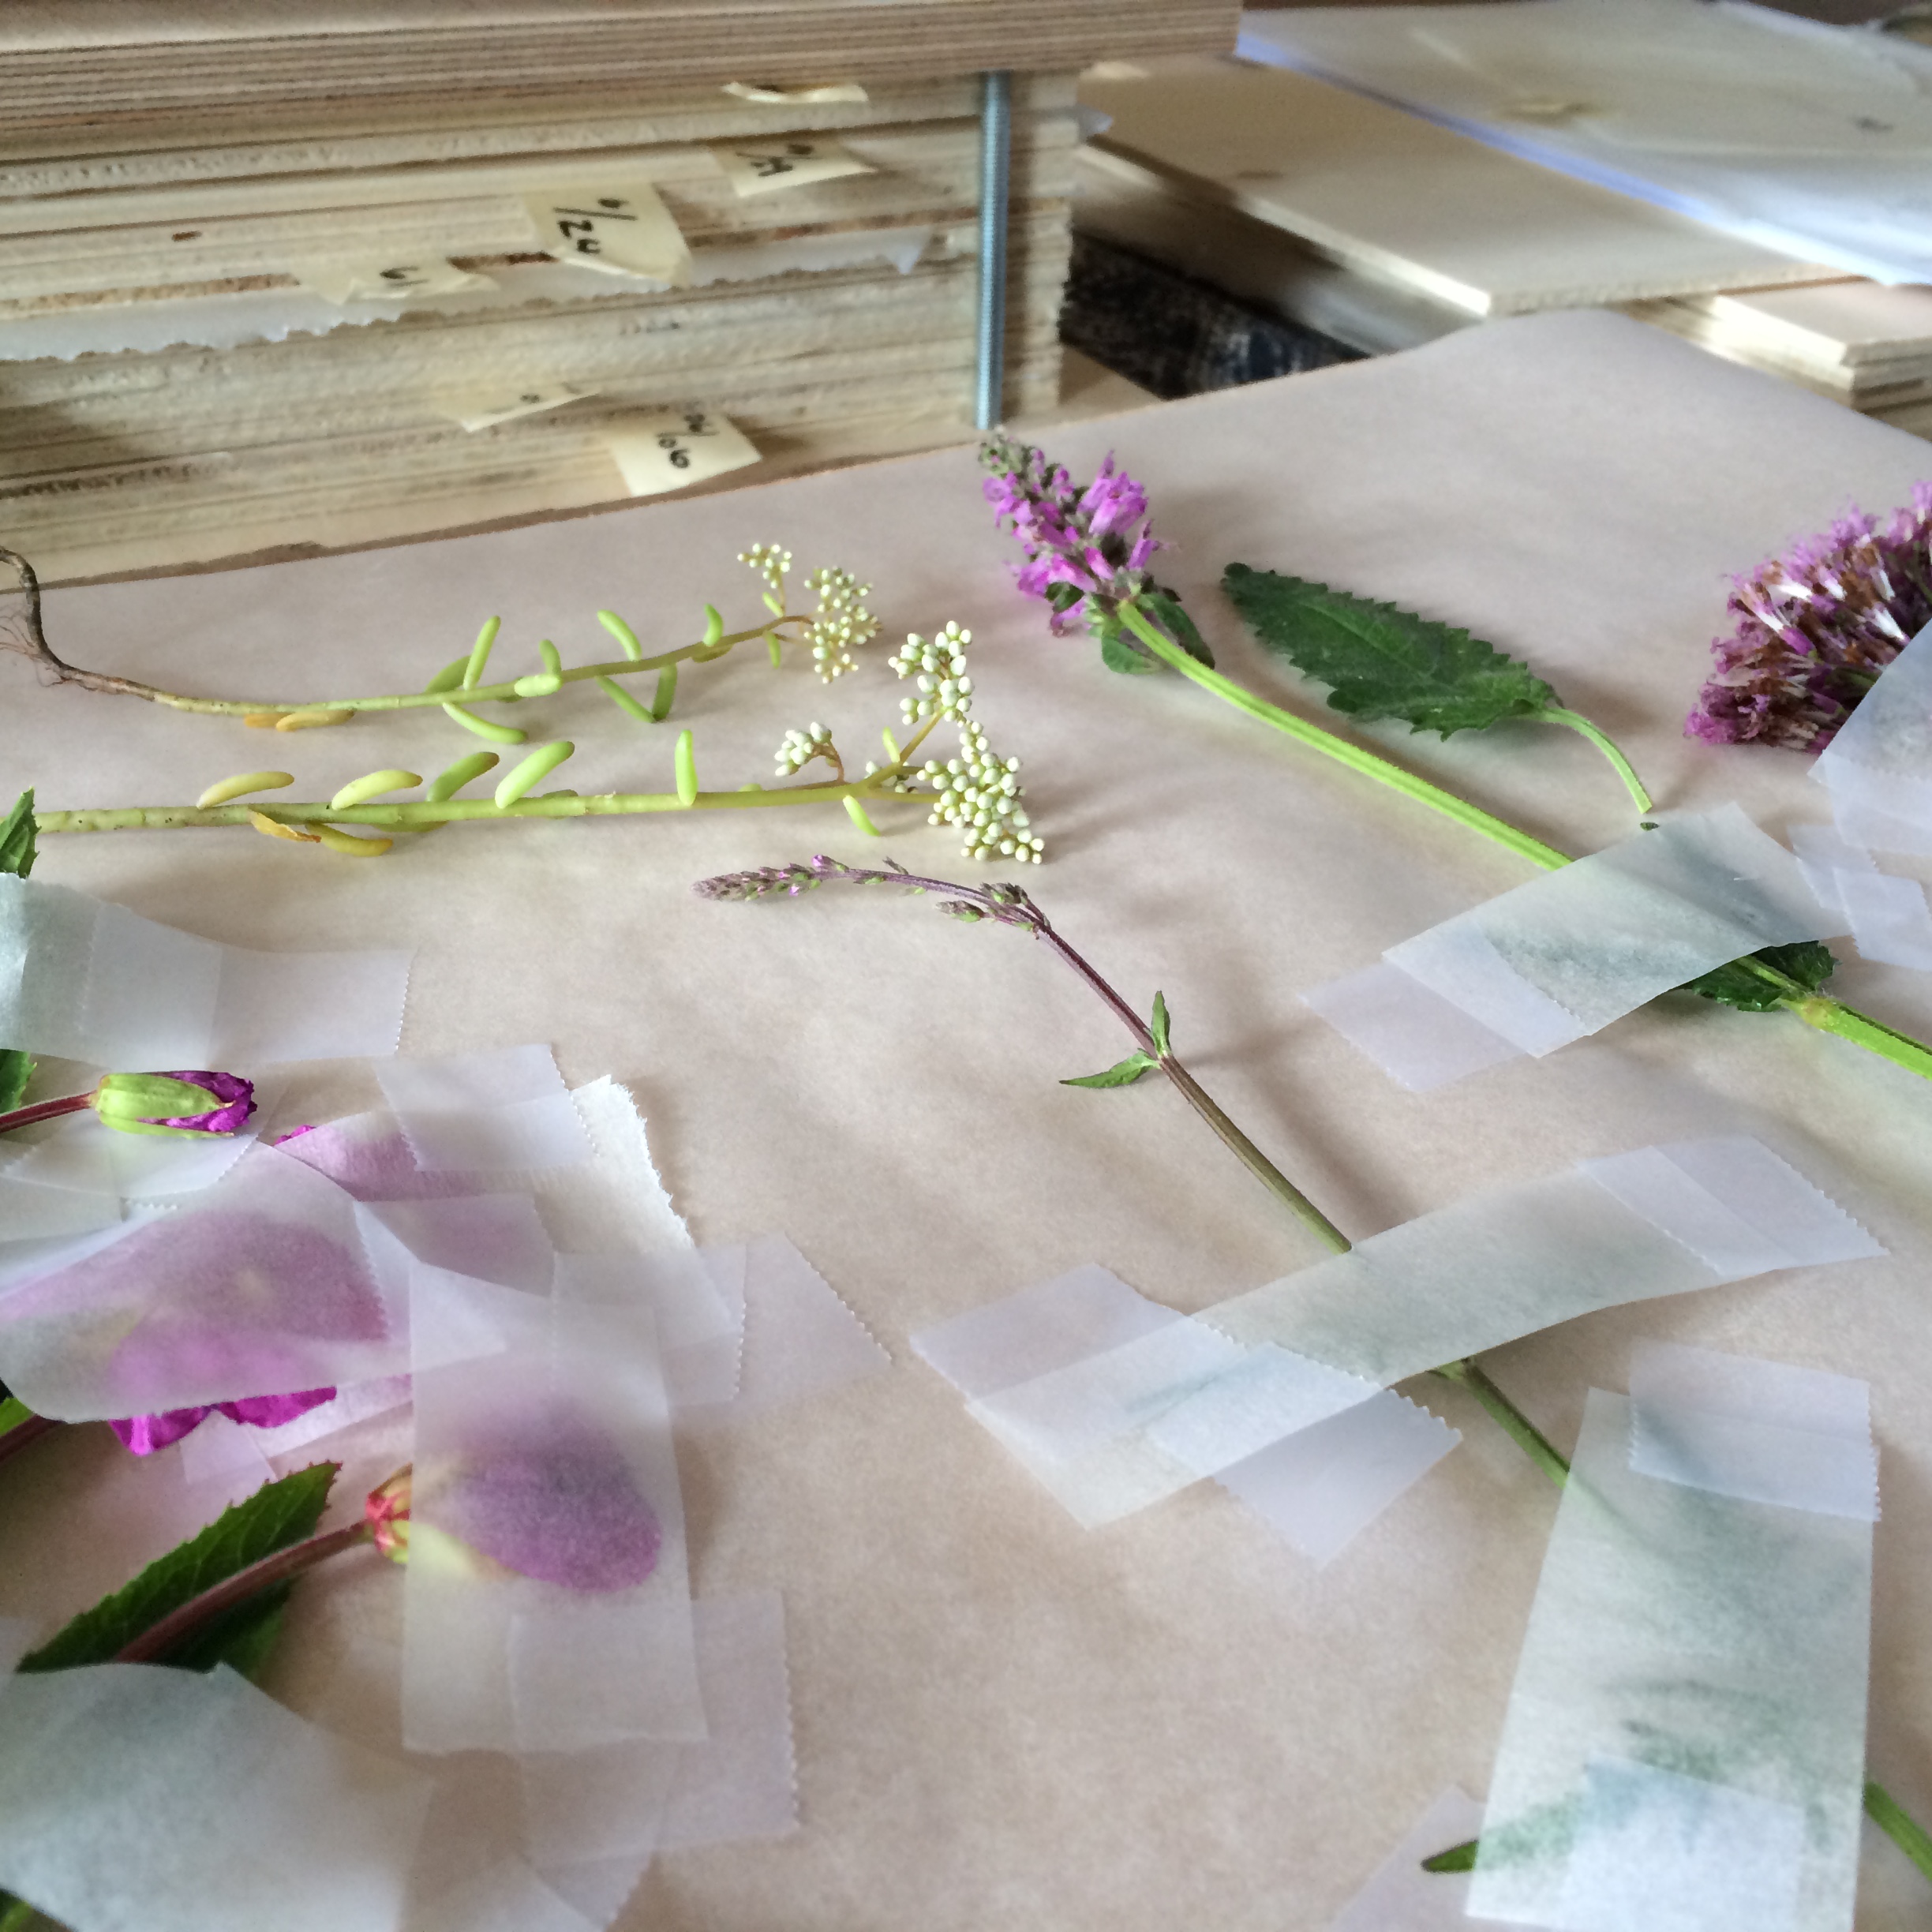
Arrange plants in their natural structure, minimizing overlapping parts and highlighting unique characteristics.
step 2: preparation - arranging the specimens
I use sheets of thin plywood, with sheets of parchment paper above and below the plant for pressing. I personally have had the best results using parchment paper as opposed to newsprint, which can pull the color from the blossoms. Do note, that I work mostly with delicate wildflowers, for which this method works well. Plants with a higher moisture content, such as garden varieties with double blooms or those with succulent leaves, may require newsprint to wick the extra moisture away and prevent molding. To ensure that the plants dry evenly, place only plants with similar thicknesses and moisture content together on a single layer. Arrange plants to minimize overlapping parts, taking extra care to isolate the blooms. The arrangement should highlight special parts of the plant that are critical for identification, such as leaf backs or cross-sections of flowers. To hold plants in the desired place, I use strips of the parchment paper and transparent tape, avoiding contact between the blossoms and the tape. When arranging the plant, be mindful of the natural structure of the plant to avoid unnatural-looking compositions.
step 3: pressing - pressing the specimens
After proper preparation, load the plants into the press, making sure there is a layer of parchment between the plants and the plywood dividers on both top and bottom. After the press is full, apply pressure to keep the plants flat while they dry. I prefer to use a simple plant press (this one here is self-made), where wingnuts allow the pressure to be carefully adjusted. This ensures the plants remain flat enough to prevent bubbling, but also helps ensure they are not getting squashed beyond recognition. A stack of heavy books can work in place of a plant press, but lacks the ability to fine-tune the pressure, which I find to be one of the keys to a successful pressing.
When loading the press, include a sheet of parchment above and below the plants. Don’t forget to date the specimens!
Inspect the plants after 24 hours to rearrange the specimens or to replace paper as needed.
step 3: pressing - pressing the specimens (continued)
After 24 hours, open up the press and observe the plants. If the parchment on top of the plants is wrinkling with moisture, it can be replaced with a fresh sheet. The specimens are still pliable at this time and can be rearranged slightly into their final positions if needed. Resist the urge to rearrange or remove the paper from very thing or delicately petaled specimens at this stage, as they may fold up on themselves if the paper is removed. Close the press and reapply the pressure, a bit more tightly than was done the previous day. Leave the plants in the press for about 5 days before checking again- I have found that most plants need about a week until fully dry, while some fleshier plants can take up to two weeks. Remove plants from the press as they are dry and readjust the pressure for those that remain.
step 4: mounting - mounting the specimens
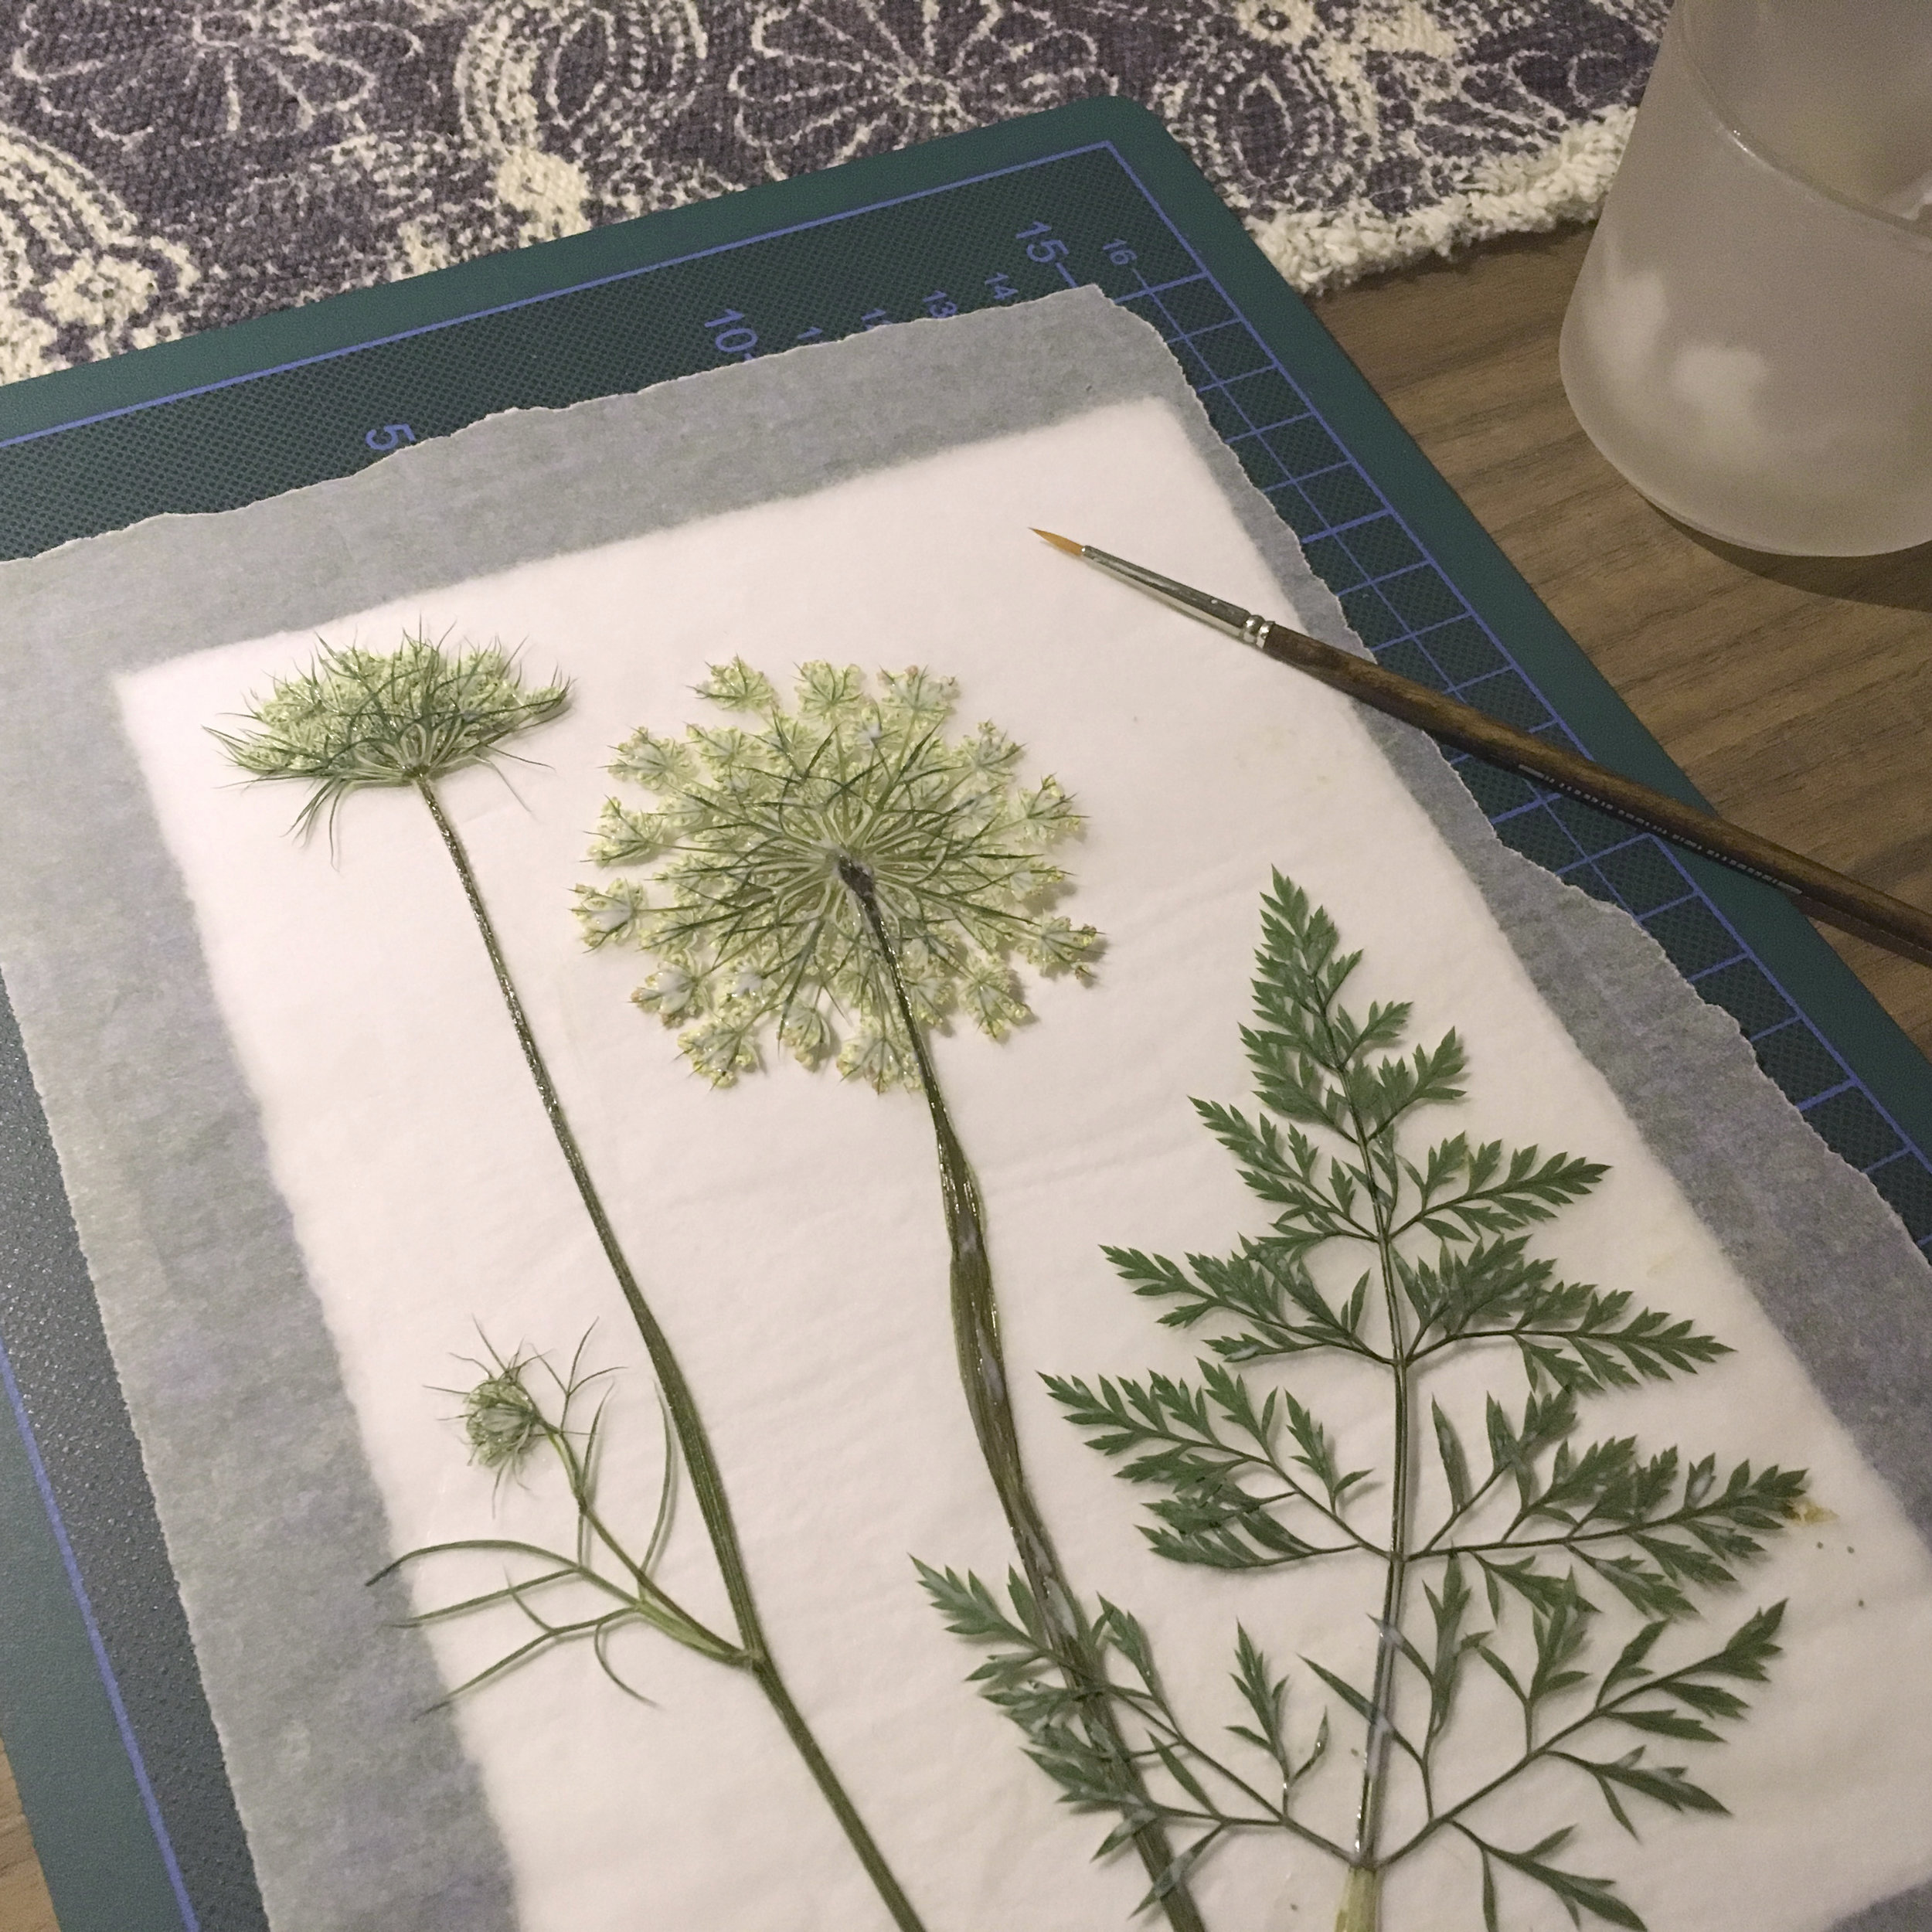
Once the plants are dry, they are ready to be mounted. It is important to use acid-free paper and adhesive to help ensure preservation of the specimens. I use an acrylic adhesive from Lascaux, which is light-fast, age-resistant, and flexible after it dries- this allows for the small amount of expansion and contraction that the plant will inevitably go through when in storage. Thin the adhesive with water, to achieve a consistency that is easily applied to the backside of the plant with an acrylic brush.
It is important to mount the specimens using acid-free paper and adhesive to ensure their preservation.
Work quickly but carefully when applying the adhesive, saving the most delicate areas for last.
step 4: mounting - mounting the specimens (continued)
Take care to touch the plant as little as possible during the process, as oils from the skin can damage the specimen. I use tweezers and thin wooden skewers to move the plant and to hold it in place as I work. For best results, apply adhesive to all parts of the plant, all the way to the edges. Be sure to pick up and adhere overlapping parts of the plant, for a full mount. Work quickly but carefully- on more complex plants I apply the adhesive to the flower petals last, to prevent the glue from drying and curling the flowers as I complete the rest. Place the paper atop the overturned specimen, and rub the backside until the plant sticks. Upon overturning the paper, check for any loose elements and touch up with glue as needed.
step 5: freezing - freezing the specimens
After mounting the specimens, I again lay each one between layers of parchment paper, separated by the plywood dividers as they were in the press. This stack of specimens is capped with thick boards on either side, wrapped in plastic foil, and strapped together tightly with adjustable belts. The entire stack is then placed in the freezer for 72 hours- an important step for eliminating any potentially harmful insects or fungus that might still be residing in the specimens. The plastic foil protects the specimens from condensation, and the pressure from the belts keeps the specimens flat and ensures good contact to the paper as the mounting glue dries.
Freezing is an important step, to eliminate pests that can damage the specimens during storage.
Invest in a good dichotomous key and hand lens to help with identification.
step 6: identification - identifying the specimens
Identification should ideally be done as soon as the plants are collected and before they are pressed. But it is a time intensive step which I often do not complete before the plants begin to wilt. So I often find myself identifying the plants after they are already pressed and mounted. For this to be effective, be sure to record observations from the fresh plant that may not be retained in the pressed specimen, such as color, scent, and stem and hair structure. Invest in a good dichotomous key that identifies plants in your immediate area- I highly recommend “Flora Helvetica” in Switzerland and the surrounding countries. Also invest in a good hand lens, to magnify the small but important identifying characteristics.
step 6: identification - identifying the specimens (continued)
Once I have identified a plant, I compare the specimen to various photographs of that species for confirmation. But even more useful for confirmation are botanical illustrations, which illustrate each plants specific identifying characteristics better that photographs can. Some of my favorites include the "Hortus Eystenttensis : The garden of Eichstatt" and my old copy of "Gray’s Lessons and Manuals of Botany" for general plant anatomy. "Botanicum", a Kew Gardens publication, contains beautiful, stylized illustrations of the characteristics of different plant families.
Botanical illustrations are a useful (and beautiful!) identification aid.
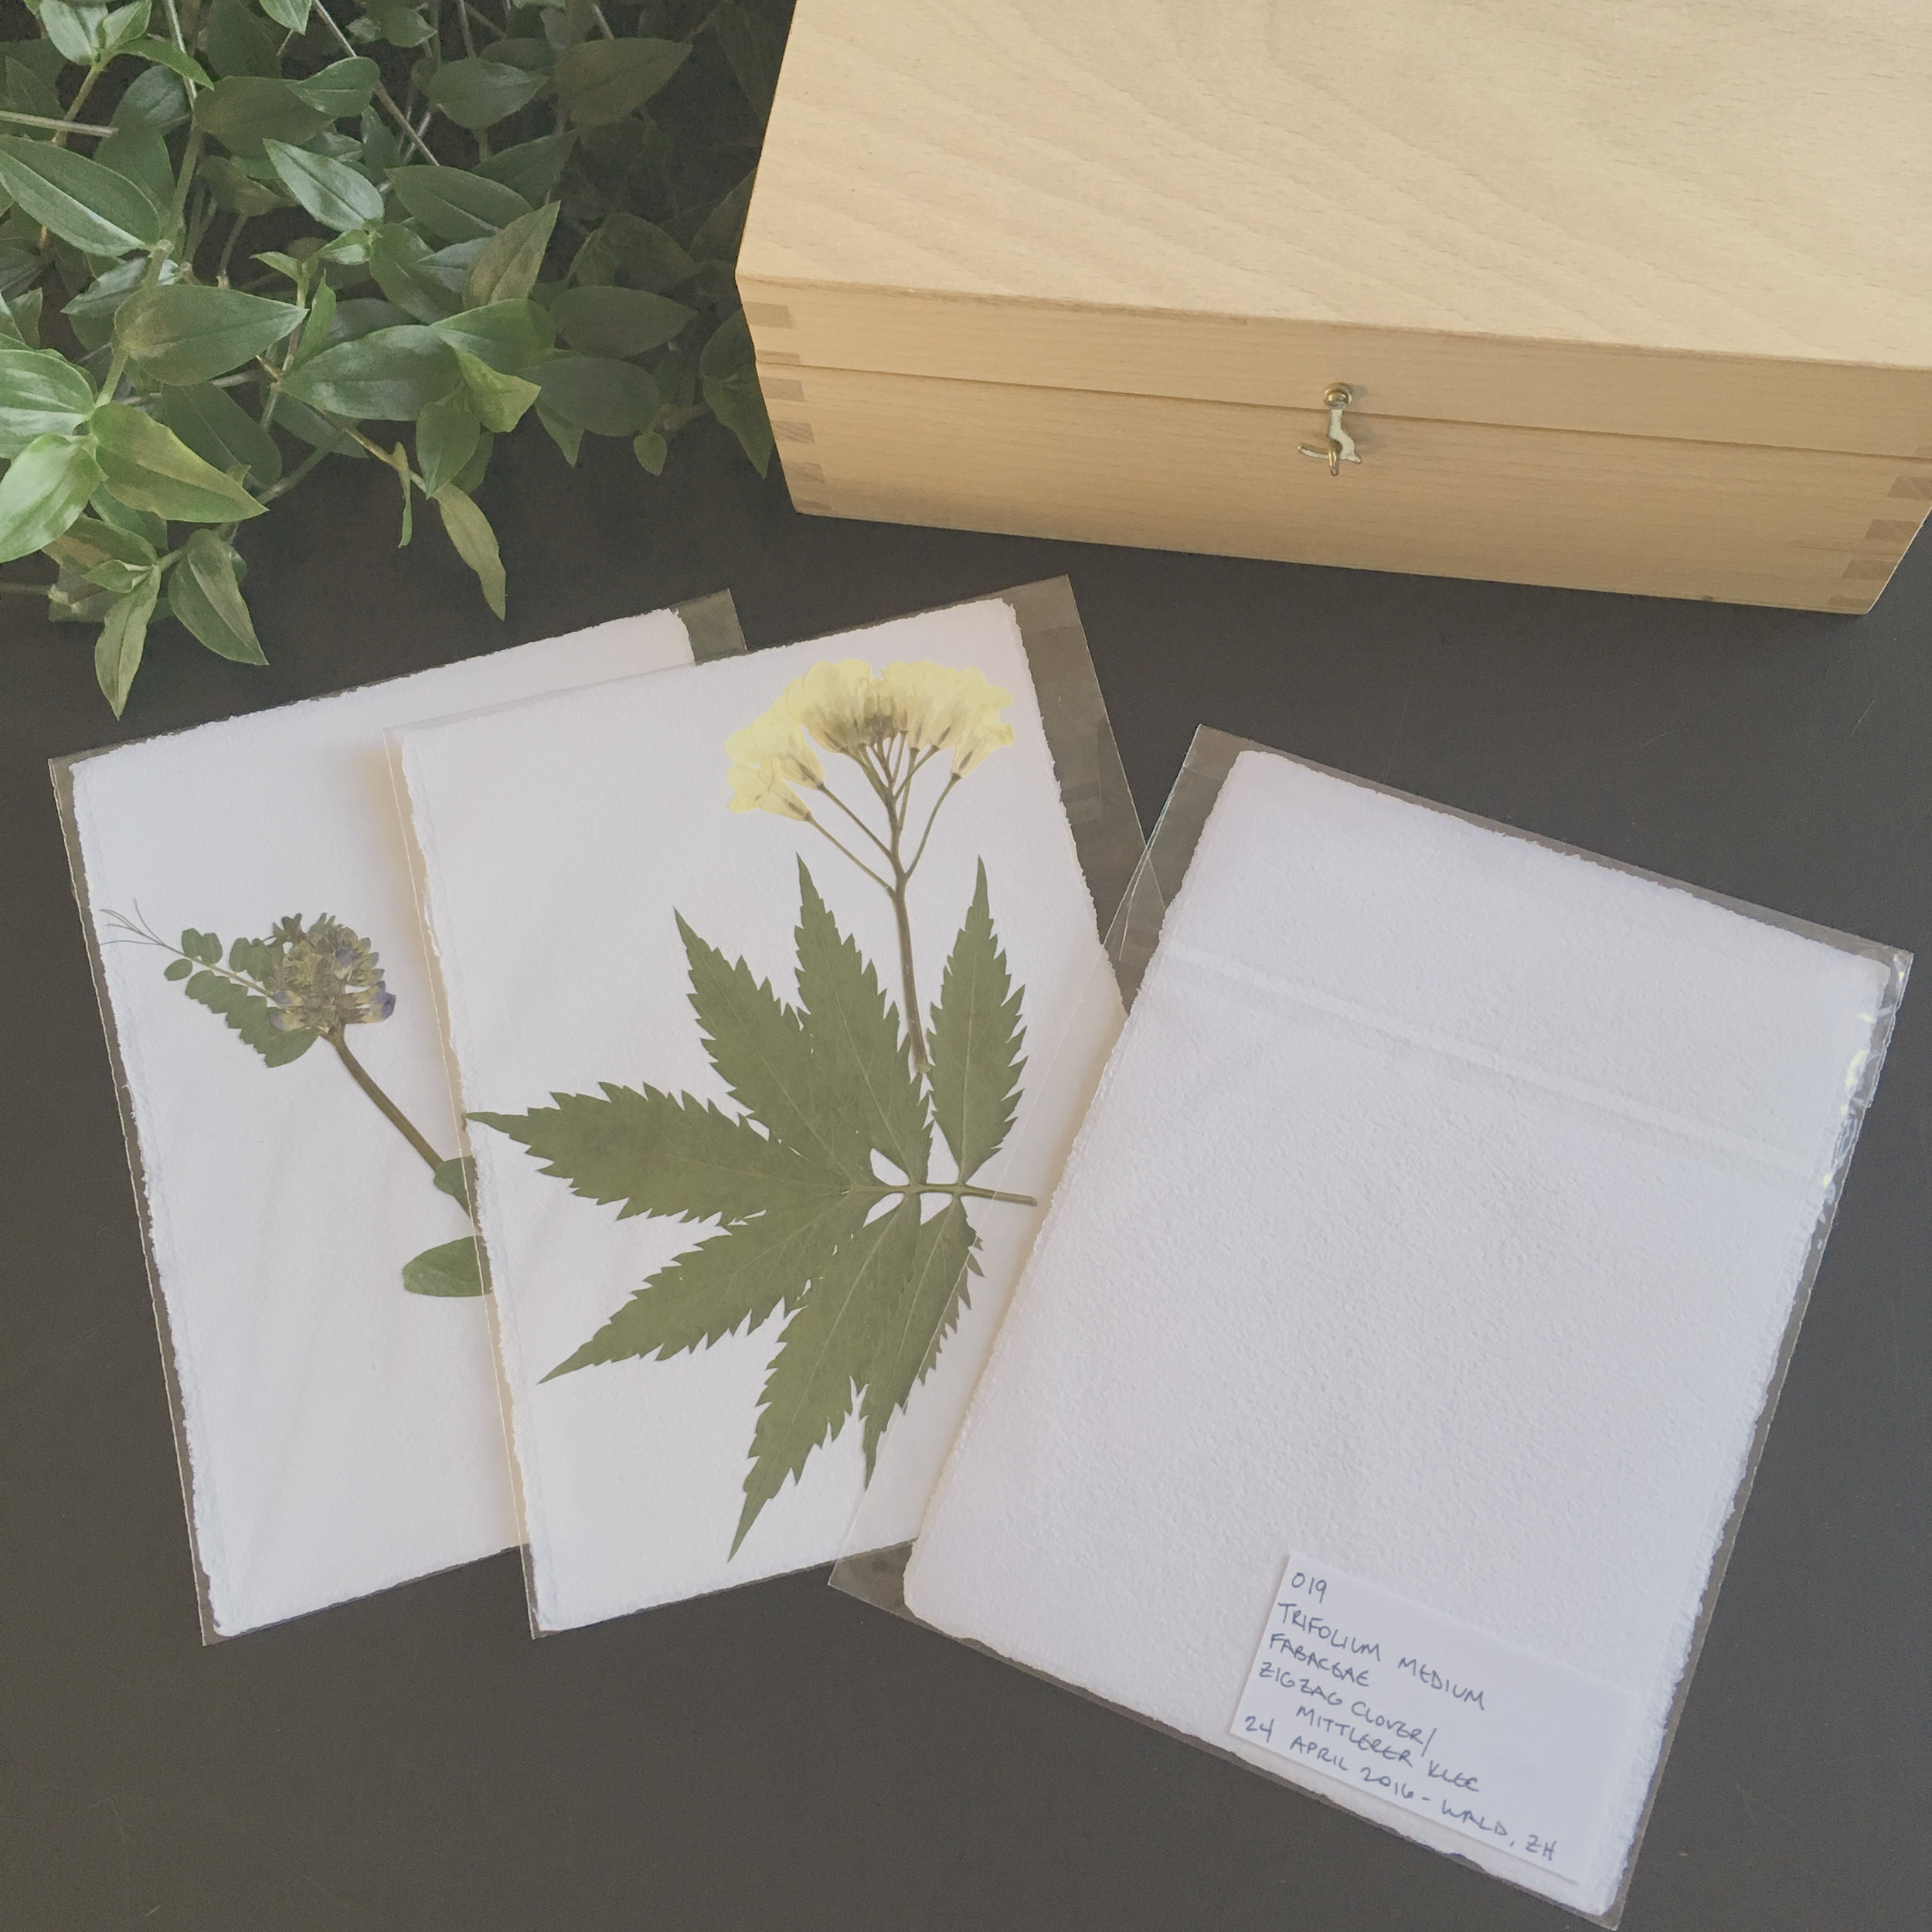
Store specimens away from direct sunlight to prevent fading.
step 7: cataloging and storage - preserving the specimens
Each plant is assigned a number, linking it to the digital database where the corresponding photographs and plant information is stored. To protect the herbarium specimens from damage, I insert each into a transparent, acid- free plastic or paper sleeve, and label it with the identification number, botanical and common name, and place and date of collection. The final specimens are stored in wooden cases to protect them from light damage. Cedar shavings in the cases help deter insect pests. The specimens should be inspected frequently for signs of insect damage, and refrozen (Step 5) if extermination is needed.
Do you have additional tips, further questions, or comments on the process? If so, leave them below! I look forward to learning from and about your experiences. For those new to the process, I hope my guide is helpful in getting you started, and I hope you will share your results!


